Wednesday, November 21, 2012

Cards on Wednesdays returns!

Awhile ago October Afternoon sent me a box of goodies. And then I was all busy with life. You know, that thing that just seems to get in the way of scrapping all the time? So last weekend I finally had a chance to dip my toe into that big box of creative goodness and make a few cards.

Some scrapping buddies of mine helped me out with a vending thingy I did at a crop earlier in the month and were superheroes that came to my rescue when I needed help. What better way to say, "Thank you," than to make some cards with October Afternoon's new Midway line and to slip a little surprise inside?

So here is one of the cards I made. (Three of the girls haven't received theirs yet, so I'll post those another day.)

Nothing super fancy, but fun none-the-less. Now, keep in mind... I made these at the scrapbook store and arrived with nothing more than my purse and my brain (and  I'm sure some people are probably questioning whether my brain was really along or not). It was kind of a "Macgyver of Card Making" of sorts. The only items available to me were: the inventory in the store; the tools in the workroom; and whatever I could find in my purse (which sadly included no chewing gum so I had to buy adhesive - hee hee!).

So armed with a sharpie, 3 items from the "buttons by the piece" bin, a few sheets of paper, a sticker, a trimmer, and some new adhesive... this is what I whipped out:


Well... this and another card that I clearly forgot to photograph during my covert creative mission. (Oops!)

ANYWAY.... 
And of course the inside needed to be just as colorful as the outside (plus it needed a pocket to hold the surprise)!

Who says card making can't be simple, easy, and fast? I bet it would have taken longer to pick out a Hallmark and not nearly as cool! *wink*


Monday, November 12, 2012

Purge much?

At the beginning of November I was a vendor at The Get Inspired Expo, a 300 (yes THREE-HUNDRED) person all-day crop hosted by the very lovely and ever so sweet Minna. When I first signed up to vend I had intended to do something different with my booth and only signed up for a half day. Well at the last minute, I decided instead to do a major de-stash and sell my extra scrapbooking supplies instead. Yes, ladies, I did a cut-throat purge of nearly 12 year’s worth of scrapbooking goodies. Whew... I can't believe I've been scrapping that long...and even more, I can't believe I'm that much older already!

I've been scrapping for about 12 years now and I've never really "de-stashed" at all. So after tripping over too many supplies for days and days I finally decided that I was going to bite the bullet, get cutthroat about it and just PURGE, PURGE, PURGE my way to a better workspace.

And it all sounded like such a good idea until...

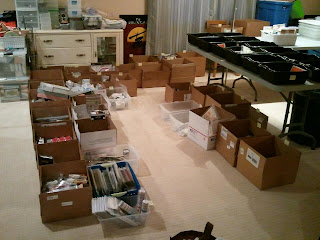
My basement started to look like this:
About 1/8th of the basement, mid-sort.

And that pile found a few more friends, and grew a bit bigger...
And at this point, my husband suggested we might need to get a trailer to haul it all.
(Good thinking dear.)

And then the paper started to pile up like this:
Yes, that's TEN bins of paper.


 And this is what it all looked like when loaded into the trailer:
And that's just insane!
 

And then it was such a crazy flurry of activity that I totally forgot to take pictures of the booth! So, just imagine 10x20 feet of scrapbooking supplies and a whole bunch o' scrappers okay? ;)
 
So on the big day, my booth was WAY more popular than anticipated and by 10 am we were swamped... and COMPLETELY out change. EEK! Fortunately some of my scrapping buddies were right by us and willing to make a bank run for me. Then, when it came time to shut down for the day we were asked to stay, but that meant packing up and relocating and re-displaying six eight-foot tables of scrapbooking supplies in under an hour. And again these fabulous ladies were kind enough to give up some of their scrappy time to help me out. Aren't scrappers just the best?
And we sold TONS of stuff, but still had quite a bit that came home with us too. Which I had to re-sort and re-organize before putting it away.
 
And now I'm really glad that's all done with! So, if I can just clean up the wake of destruction left in my scraproom, I'll be all set and back in business!
 

Tuesday, November 6, 2012

Tutorials on Tuesdays: Printing on die cut accents

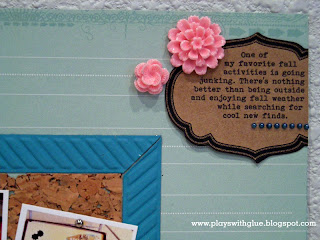
I love journaling spots. I can't get enough of them. My favorites are the kraft ones from Maya Road and the journaling cards from October Afternoon. And while I like my handwriting and often do my journaling by hand, sometimes I want the effect of a certain font (like a vintage typewriter as shown below).


Click to bigify.
Font: Bohemian Typewriter
Journaling spot: Maya Road

Today, I thought I would share with you an easy way to make sure your journaling will show up.
  • Open a new document. (I use CorelDraw design software, but you could use other sofware like Adobe Photoshop Elements or Microsoft Word too).
  • Measure your die cut that you want to print on and add a box to your new document that is the same size. Make sure the inside of the box is white and that there is an outline showing.
  • Mark which end of the paper you load in the printer first. (Trust me, this will be VERY helpful later.)
  • Print out the page with the box on it.
  • Download a picture of the die cut from the manufacturer's web site. If it's a grouped image, crop it down to just the die cut you are using and crop it tight.
  • Place the downloaded (and cropped if applicable) image inside of your box. Measure your die cut and resize the downloaded image to match the size of your die cut. 
  • Turn off the outline of your box (set the color to none or white) so it won't print.  If you're using design software that allows you to place the image on it's own layer and set it to be view only (no printing) do that too.
  • Layer a text box over the image and type your journaling. 
  • Print the page out with the die cut and the journaling image. Now would be a very good time to pay attention to which end is up. :)
  • Once you're finished, if you can't set the image of the die cut to not print, delete the image of the die cut before printing. This will make a template to help you make sure you get the orientation of your die cut correct when you run the real one through.
  • Lightly affix your die cut inside of the box, over where the image of the die cut and journaling were.
  • Load it into the printer (now would also be a great time to make sure you load the paper the right direction).
  • Print
  • Voila! You have a printed journaling card ready to go on your next layout!