Wednesday, December 15, 2010

Christmas Project #6: Simple Crackled Glass Ornament

I love to give handmade gifts, but the hustle and bustle of the holiday season doesn’t always allow time for that, so one of my goals this holiday season is to make an ornament a night in an hour or less. It’s a nice way to de-stress at the end of the day.


This ornament that takes less than an hour to make (not counting dry time).
  
Materials used:
  • Ranger Memory Frames (2x2)
  • Ranger Memory Frames Glass (2x2)
  • Ranger Crackle Accents
  • October Afternoon Patterned Paper
  • Bazzill Pink Tulle
  • Offray Cream Flower
  • Deja Views Black Holiday Rub-on

  
Instructions:
  1. Cut two pieces of paper to 1-15/16 x1-15/16.
  2. Place the papers back to back in between two pieces of memory glass.
  3. Add Holiday rub-on to the glass in the lower left corner.
  4. Slide the memory glass sandwich (glass + paper) into the Memory Frames.
  5. Flood top of glass with Crackle Accents. Allow to dry overnight or about 10 hours before flipping over and doing the same on the reverse.
  6. Once crackle accents is dry, glue flower in upper right corner.
  7. Cut Bazzill Tulle approximately 10” long (or a little longer if you want to make it easier to work with) and double the layer so it’s 5” long.
  8. Tie the tulle around the memory glass hanger leaving the ends sticking out and not pulling the loops all the way through. Cut the loops to make more “ends” and trim to desired length.
  9. Admire and enjoy your new ornament!

Monday, December 13, 2010

*Two Peas Holiday Sharing Project* Holiday Door Hanging

I am super-psyched to have the privilege of sharing my project with my fellow peas for the Two Peas in a Bucket Holiday Sharing Event. When I found out my project was selected I was really surprised (because hey, it's just something that little ol' me put together), but seeing the talent that has contributed projects so far, and getting to be a guest designer amongst them... well I'm just speechless! :)


In October I participated in the Maya Road Challenge on Two Peas in a Bucket and was one of the lucky finalists. When my package of Maya Road goodies arrived (Thank you Maya Road!) there were several of the Journey Tins included and I thought they'd make adorable little shadow boxes. And then I thought, what's more adorable than a shadow box? A shaker box! So I compiled all of those ideas into one fun little door hanger.


Here's how to make your very own...


Materials Used
  • Chipboard Background – page from a Maya Road  Mix it Up Mini Album (also won in the Two Peas Challenge)
  • Patterned Papers – K and Co (Swell Noel line)
  • Playing cards - dollar store
  • Metallic pipe cleaner – Michaels
  • Chipboard Bird – My Minds Eye
  • Chipboard Flourish (bird wing) – Maya Road Decorative Scrolls Chipboard Set
  • Blue and red chipboard frame – Maya Road Ornate Tags Chipboard
  • Metal tins - Maya Road "Journey Tins"
  • Paints, Inks, and Alcohol Inks – Ranger
  • Gingham Ribbon – Craft Supply
  • Jingle Bells – Craft Supply (Michaels)
  • Jump Rings – Tim Holtz
  • Snowman – Maya Road Trinket Pin
  • Red floss (snowman scarf) – DMC
  • Micobead Glitter – Martha Stewart
  • Poinsettia Brad – Creative Imaginations (have also seen a very similar one in a Paper Studio brad set at Hobby Lobby)
  • Wreath – Craft Supply from Michaels
  • Holiday pieces - Dress it up from Michaels


To create the happy holidays plaque
  1. Paint the inner piece with a red pepper dabber, then using a cotton swab or paint bush, add a little bit of a darker red dabber (or distress ink) to create a weathered two-tone effect.
  2. Paint the outer piece with a light blue dabber and add a little bit of a darker blue dabber (or distress ink) over the top to create a weathered two-tone effect.
  3. Add "happy holidays" pieces to center of red piece.


To create the bird embellishment
  • Start with a My Minds Eye chipboard bird as the base.
  • Use a Maya Road chipboard flourish for feathers. Spray with metallic silver Maya Mist. Then, paint with a thick layer of Tim Holtz Crackle Paint (Picket Fence) using a stippling technique to build more texture. I am impatient, so I use my heat tool to speed up the drying process. Once dry, spray with a mini mister that has water plus 8 drops of antique linen reinker (or just tint it down with a little antique linen distress ink).
  • Glue flourish to bird.
To age the playing cards
  • Sand bottom half of the playing cards with very fine sand paper.
  • Apply 1-3 small drops of butterscotch alcohol ink to the alcohol ink applicator
  • Working over a splat mat Rub the alcohol ink onto the playing cards until you have the color you desire. If you get too much, you can remove it with alcohol blending solution. You can also add a drop of alcohol ink to the applicator to re-wet the already applied ink and rework it. I also used a new felt applicator to buff off the excess.


 Making the shadow boxes
  • Wreath tin
    • In the large square tin, punch or cut a square of the blue patterned paper. Use a small corner rounder to round all four corners. Apply glossy accents to the back of the paper. Glue the paper to the inside of the tin by wiggling it around a little and then letting it dry.
    • The wreath will be a little too thick to fit. Gently flatten the back side of the wreath without flattening the front. Place inside the tin.
    • Apply a little glossy accents around the edge of the tin and then fit the lid on. Hold for 10-15 seconds to allow the glue to set a little.
  • Poinsettia tin
    • In a small sqaure tin, punch or cut a square of green accent paper. Round the corners with a small corner rounder. Apply glossy accents to the back of the paper. Glue the paper to the inside of the tin by wiggling it around a little and then letting it dry.
    • Remove the prongs from the back of the poinsettia brad. Glue the brad to the background paper using glossy accents.
    • Apply a little glossy accents around the edge of the tin and then fit the lid on. Hold for 10-15 seconds to allow the glue to set a little.
  • Snowman tin
    • In a small sqaure tin, punch or cut a square of pink accent paper. Round the corners with a small corner rounder. Apply glossy accents to the back of the paper. Glue the paper to the inside of the tin by wiggling it around a little and then letting it dry.
    • Making the little snowman
      • Tie 3 strands of red embroidery floss between the top and middle to create the scarf. Use wire cutters to cut off all but a little bit of the metal pin.
      • Put a 1/8" pop dot on the bottom left edge of the tin. Put a few small drops of glossy accents on the back of the trinket pin and then push the snowman into the pop dot to hold it in place.
      • To create the "landscape" fill the bottom with glossy accents varying the height to create the shape of little mini hills. Pour some Martha Stewart micobead glitter in to the tin at the top.
      • Apply a little glossy accents around the edge of the tin and then fit the lid on. Let the microbeads
To assemble
  • Remove a the page with scalloped edges from the Maya Road Mix it Up album. Cover it with the Santa paper from the K and Co Swell Noel line. (Don't forget to punch out the holes! I used the crop-a-dile).
  • Add the playing cards to the upper left corner.
  • Fit the journey tins across the bottom of the page just above the holes. Lightly the mark the top of the large and small tins. Apply wonder/tacky tape to the back of the ribbon and glue it to the page before gluing down the Journey tins.
  • Place the bird so it's feet are just above the large tin.
  • Glue the "happy holidays" plaque on a slight angle in the upper right corner.
  • Using the large Tim Holtz jump rings, hang jingle bells along the bottom. Open the spring rings by bending one end forward and the other end backward rather than pulling the ends apart.
  • Attach a pipe cleaner through the binding holes. Bend about one inch from the end and twist around the pipe cleaner.
Enjoy!

Sunday, December 12, 2010

Christmas Project #5 - Gift Card Tin

Since there are only two weekends (one really since this weekend is almost over) before Christmas, I figured it's time to get wrappin'! My family draws names, so fortunately I have only a few to do, which leaves me with a little more time to personalize what are normally fairly impersonal gifts, gift cards. Since they're small, generic and not as exciting as other gifts, I try to make gift card containers a little more interesting.

Gift Card Container made with Ranger, Maya Road, and Making Memories products

These are fairly quick and easy to make. Especially if you use your heat gun to speed up the paint drying process :)

Step 1 - Alterning the Making Memories "Vintage Findings" Tin Box
  • Coat the top with a generous layer of "Peeled Paint" Crackle Paint (Ranger). As you're applying the paint work some texture into it. Use heat tool to speed up drying.
  • Paint edges and sides with "Lettuce" paint dabber. Then rub a little of the lettuce paint on the top too. Use heat tool to dry.
  • Highlight high spots with a little "Walnut Stain" Distress Ink (Ranger) on top and sides of tin. Set ink with heat tool.
  • Add a little "Gold" paint dabber around the edge of the top for a little shiny glam :)

Step 2 - Create the layered poinsettia embellishment
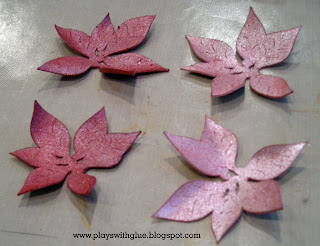
Poinsettias made from Grungeboard with Maya Mist and Cricut

  • Cut 4 poinsettias from the "Joy of the Seasons" Cricut cartridge.
    • Blade: 6 | Speed: High | Pressure: Max | Multicut: 2
    • As it's cutting you made need to help hold the grungeboard in place.
  • Once flowers are cut and ready to go, place in a box and spray with Maya Mist
    • Spray 2 with Strawberry Metallic and 2 with Pink Grapefruit.
    • I let them sit briefly, then lightly sponged dry with a paper towel to get a look that was more metallic than pigment.
    • Once dry, use a stylus to bend and curl the leaves to get a little more realistic dimension going.
    • Stack and use a brad to secure (I liked using the brad because that allowed me to continue turning them once stacked until they were right were I wanted them.
    • Once you're happy with how they are stacked, pull a piece of metallic pipe cleaner through an "Bubblegum" pink button (American Crafts) and then affix it to the brad and flower stack with hot glue.


Step 3: Finishing off the top
  • Punch a 1" circle from a scrap of cardstock.
  • Cut pieces of light and dark pink tulle and attach with a tiny attacher as you work your way around the circle.
  • Then, holding the poinsettia to the center for reference, use scissors to trim down until it's just slightly bigger than the top of the tin. I also was careful to cut the tulle in triangle or wedge shapeds beause I wanted to create a base that resembled the skirt of a ballerina or little pixie fairy.
  • Use hot glue to affix the tulle pinwheel to the poinsettia and then again to attach the whole thing to the top of the tin.
Place the gift card inside, add gift tag and you're ready to rock your holiday!

Saturday, December 11, 2010

Christmas Project #4 - Christmas at Home

The holidays are a time to spend with friends and family at home. One of my favorite things to create are mini books that highlight my favorite photos from Christmases past. They can be displayed on plate holders, hung on the tree, or placed in a basket on the coffee table.

I created this fun little mini to document our first Christmas in our first home. It features some shots of us decorating and preparing our house for the holidays. It's funny too look back and see our home so sparsely appointed!

Click the image to bigify.

Thursday, December 9, 2010

Christmas Project #3 - Popcorn Gifts

You never know when a neighbor or friends may pop by over the holidays. Be ready to send them along on their merry way with these easy, make-ahead gifts.


Supplies include:
• Cardstock: Bazzill
• Pattern Paper: October Afternoon "Verry Merry"
• Ribbon: Michaels
• Beaded berries: Hobby Lobby
• Popcorn die cut & scalloped circle die cut: QuicKutz
• Holder die cuts: Cricut Machine, Fabulous Finds Cartridge, Cricut Design Studio
• Shipping Tag: Avery
• Ink: Clearsnap
• Fonts: Bookman Old Style, Machia
• Adhesive: Tacky Tape
• Safety Pin: Making Memories

To create the sleeves:


To create the scalloped flowers
-Cut or punch a scalloped circle.
-Score across the scallops (this makes it much easier to fold later)
-Fan fold around the scalloped circle.
-Open the circle into a triangular shape, cut off the tip of the triangle.
-Attach foam dots to a punched circle (may need a few to get to the height of the fold, then place glue lines around the foam dot (the peaks of the folds will stick to this)
-Place the hole of the scalloped circle over the foam dot so the foam dot poke through the middle.
-Attach another punched circle to the top to "sandwich" the scalloped circle.

You can also cut a very small amount off of the tip of the triangle and use a large brad to secure the top to the punched circle on the back.

Have fun making these and sharing them with your neighbors.

Tuesday, December 7, 2010

Christmas Project #2 - Button Wreath Ornament

Here's a slightly less involved ornament that will help you use up your button collection. And, if you don't happen to have a button collections, Hobby Lobby sells bulk buttons in their sewing department very reasonably!

Martha Stewart Button Wreath

Sunday, December 5, 2010

German Star Instructions... at last!

Growing up we had these really old german stars on our tree. I don't know what draws me to them, but I'm completely enamoured! This past Christmas I was the fortunate recipient of some German Stars that my dad made as a kid (how cool is that!?), so my desire to make my own has become a little less urgent.

Nonetheless, I've been searching for instructions to no avail for several years, but finally I've found some instructions and I'm sharing them with you.

German Star Ornament Instructions

Friday, December 3, 2010

Christmas Project #1 - Vintage Ornaments

I found this concept at the Christmas with the Cricut blog from a lady who made the most beautiful ornaments using the Ranger Alcohol Inks. I've been eyeing those inks for a long time (and those of you who know me, know I am a product/technique/tool junkie) so they finally gave me the reason I needed to go buy some. Bonus!

So for my version, I swapped the Cricut vinyl for some Hamby Rub-ons (Yay Hambly!) and went to town creating my own vintage ornaments. When I gave them away last Christmas, many people thought they were store-bought, no one believed they were handmade!

 Vintage Alcohol Ink Ornaments

Want to make your own? Here's a supply list:
  • Alcohol Ink Applicator (Ranger)
  • Alcohol Inks (color + a shade of brown or two high-contrast shades of the same color)
  • Alcohol Ink Blending Solution (for cleaning off any mistakes, or the table)
  • Alcohol Ink pearl mixatives (optional, but gives it a pretty shine)
  • Glass ornaments (I purchased mine at Michaels)
  • Gloves (vinyl/latex)
  • Glass cleaner/rubbing alcohol
  • Paper towels
  • Rub-ons (use high-quality, super sticky ones -of course I recommend Hambly) OR, Cricut vinyl and the cartridge(s) of your choice
  • Ribbons, wired beads, Bazzill tulle, wired berries, etc. for the top

Here are a few tips from my ornament making experience:
  1. If you don't like how it's coming out, you can just go back over it. The wet ink on your applicator will redistribute what's already dried on your ornament.
  2. If you really, really don't like how it's looking, you can use the alcohol ink blending solution to remove what you've already applied and start again.
  3. Adding the metallic mixatives comes out really cool! (Apply it with the other 2 colors)
  4. These inks stain... PERMANENTLY so wear gloves and old clothes and don't do it over any furniture that you'd really like to keep...or any surface that you'd like to keep for that matter.
  5. If you do get some on a hard surface like formica, you can use the alcohol blending solution to remove it, but there will likely still be a residual stain.
  6. It's addictive! I'm already thinking of vases and other things to apply this technique too!

If you want to seal your ornaments, here are some tips from inkyheart:
  • Use Creative Imaginations' Super Seal. It's an acrylic-based sealer so it won't mess with your pretty alcohol ink work and mimics the surface it is sprayed upon... so it doesn't change the look of your work either. I've used it on transparencies and acrylic as well as paper.
  • This sealer works well for Ranger and Copic Alcohol inks.
  • FYI: Most spray sealers have propylol (or some other alcohol ---lol) and those will make the ink 'dance' and especially mess up detailed images that you may have colored in (think mud puddle); so don't use Krylon for alcohol ink work, unless you are going for a crazed look. I've actually done that on purpose for my domino-based jewelry pieces.

That's it. Have fun creating your own and post a comment to share your creations!

Wednesday, December 1, 2010

Christmas Projects

The holidays are a busy time of year for me (both personally and professionally) so I generally have very little time to get my projects done let alone add them to my blog. So to make sure my blog isn't woefully neglected next holiday season, I'm posting some of my Christmas projects from 2009 over the next few days. Enjoy!

Wednesday, November 24, 2010

Cards on Wednesdays: Unity - Getting Ready for Christmas

Every year I set out to make brilliant, handmade Christmas cards... and every year I complete enough for about half of my list before I run out of time and end up abandoning the project altogether -if I get it started at all... (sorry friends and family I really did mean to send cards last year). So I started to put my mind around developing some super quick, yet handmade, greeting cards. Here's one that you can make very quickly. Actually, it's so simple that those of you with little elves (children) could probably have them help!


This very simple card is made with the following products:


• Unity Stamps "MERRY MERRY MERRY" UK-469A
• VersaFine Sepia Ink
• Copic Markers: Two shades of blue, one green, one red or pink, and one clear Spica
• Kraft Cardstock


Wednesday, November 17, 2010

Quick Flowers

Since I'm out of "Cards on Wednesdays" at the moment, I thought I'd share one of my favorite flower making techniques with you. It's quick, it's easy, and you can make coordinating flowers for your cards or projects in just a few minutes.

Here's a picture of this super-fabulous flower technique in action...

And, here are the instructions for how to make them...
  • Cut or punch a circle out of paper.
  • Then use your scissors to cut it in a spiral shape leaving a wider piece (about the size of a pencil eraser) at the end to serve as the flower base later. Don’t worry if it’s not perfect. Cutting it unevenly makes for a more interesting flower.
  • Starting from the outside end, roll the paper until you get to the wider piece. Allow the paper to unroll to the size of flower you want, put glue on the base and then tuck it under the rolled part. Hold it together until the glue dries (I recommend using zip dry or hot glue).
If you're not wanting to freehand it, here's a template you can use instead...

Wednesday, November 10, 2010

Unity Challenges - Swing Card

Before participating in this challenge I had never ever heard of a swing card, let alone tried to make one! It took me three tries to get the inner panel cut right, but in the end, I think it was worth it!


If you want to learn how to make a swing card of your very own (or see a video to better understand how the motion works go here).

Wednesday, November 3, 2010

Cards on Wednesdays: Unity WCMD - Paint

I am always on the lookout for new things to do and try and I really like to find alternatives to paper. One alternative that I like to play with is clear acetate, but it always poses a problem.... How to adhere decorative elements without the glue showing?

This Unity challenge was to play with paint. I have on occassion stamped images with paint. It's not easy to do, but possible and requires immediate washing of the stamp. This time around I thought I'd try to use it as my background on a clear card. With a bottle of Making Memories paint and a super cheap hardware store paint brush I set out to create some texture for a background on my card (no glue needed). I don't know that I'm completely in love with this card (it was created when my mojo went missing), but it was at least another opportunity to learn new things and to play with new mediums.

Saturday, October 30, 2010

On Scrapbooking

When I first started scrapbooking, it was to find a creative outlet. Throughout my life I've always enjoyed crafting, but I have very little artistic talent (you couldn't even identify a stick figure if I drew it). Then, after moving to a new town three hours away from all of my friends and family, I needed a way to connect within my community, so I began working at my local scrapbooking store (LSS) and many friendships blossomed from people I met while working there. Although I no longer work there, one of my best friends in Iowa is a fromer LSS coworker.

One thing I love about this hobby is that not only is it an icebreaker (a quick common thread, an activity to combat the ackwardness of being around new people), it facilitates learning about other people. As fellow scrappers work on their pages and projects, they share the stories of their lives with you too. Often times blessing you with a glimpse into their lives that you wouldn't normally get through an e-mail or over a cup of coffee -or even from their facebook pages and blogs.

Last year, several of us met once-a-month to spend a day scrapbooking. This year schedules have been busy and we've fallen out of the rhythm of it. Now, my husband has found this to be a good thing because I'm not constantly packing and unpacking my supplies which leaves me in a constant state of disorganization (which vexes me greatly) or the house a mess of supplies (which greatly vexes him).

One notable difference pre- to -post LSS employment is that my "stash" of supplies has grown exponentially -much to the chagrin of my husband. Now, as a scrapbooker I am delighted to have what I need when I need it (i.e. in the wee hours of the morning when I tend to scrap). But this also creates a conflict, because when I do want to leave my house to scrapbook it has become increasingly difficult in time to pack and I inevitably forget atleast a few key items for my project. I've often heard from other scrappers the same delimna. We feel pressured to be productive when we spend a day on creativity, but leaving our homes often leaves us in less-than-ideal working conditions.


So, what's a scrappy girl to do?

In my case, I've learned to be honest with myself. I'll never create as much as I would like when I'm away from my scrapspace, so I pack lighter. But, isn't the point to scrapbooking to preserve memories? If I never leave my scrapspace to foster friendships and create memories, then I'll be starving my own hobby. So, next time I have a choice between being productive or building friendships, I'll choose scrapping with friends and building friendships.   :)

Wednesday, October 27, 2010

Cards on Wednesdays: Unity WCMD Challenge - Soar

Sometimes I need a little creative break during the week, but I don't always have time for a layout or a big project so I like to sneak in a little card making. Here's a super simple, and super quick, card using a Unity Itty Bitty stamp and some scrap patterned paper (October Afternoon of course!).

Bazzil: Kraft Cardstock, Vanila Cardstock; QuicKutz Embossing Folder; Unity Stamp Co. Butterfly Stamp; October Afternoon Patterned Paper; Queen & Co. Pearls.

How to Create this Card
  1. Cut an 8.5x11" piece of cardstock in half to 5.5W x 8.5H. Score at 4.25H.
  2. Place card front in embossing folder and emboss.
  3. Cut a strip of vanilla cardstock a little wider than the card (approximately 4.5" wide) and about 1.5-2"H. Emboss this piece as well.
  4. Align circles of the vanilla piece to those on the card front, adhere and trim excess off of the sides.
  5. Stamp butterfly image twice onto patterned paper. Cut out both shapes along the outer black line.
  6. Stack the two butterfly pieces on top of each other and staple in the center where the body would be. (I like to use the Tim Holtz Tiny Attacher for this.)
  7. Adhere bottom layer butterfly to the card front. Fold the wings up and crease along the staple.
  8. Add pearls over the top of the staple to conceal.
  9. Add sentiment inside if desired.
  10. Enjoy your completed card.

Thursday, October 21, 2010

It's my lucky day... no, really, it is!

So I've been a little blah lately 'cause things at the real job haven't been going too well and have involved LONG hours that cut into my scrappy time...hrmph! But today, I came home to find I had a message from Two Peas... I had entered their Maya Road Challenge (totally <3 them and their products!) and guess what?! I was one of the top 3 so a MR "runner up" prize pack is on it's way to me, YAY! Check out the winning entries here.

Then, I remembered that the Unity World Card Making Day (WCMD) Challenge winners were being announced today so I hopped on over to their blog to see the winning entries and start firing up the creative juices for my scrappy outing tomorrow night. The individual Unity/Ippity DT members were posting their chosen winners on their individual blogs. So I followed the first link and it said... "PLAYSWITHGLUE" -hey! That's me ;) So a new Unity Stamp will be coming my way too. Super fab!
There were lots of great cards posted for the Challenge. Check out the Unity WCMD blogpost to find links to the winners and the other entries.

Wednesday, October 20, 2010

Cards on Wednesdays: Unity WCMD Challenges

I've recently started to do more stamping. I'm still not very good at it and lack a sophisticated repertoire of stamping techniques to do anything too cool so at the moment I'm mostly a "keyline," one color on something kinda girl. Unity Stamp Co. posted a series of card making challenges on their blog for World Card Making Day (WCMD) that was hosted over on Splitcoast Stampers. So, always being one who's up for a challenge, I decided that I would try to participate. Well, needless to say I did not get all of their challenges completed due in part to a crazy work schedule, trying to finish a mini album for a Maya Road Challenge over on Two Peas, and then to top things off my creative mojo went on hiatus. So I did get a few cards together to help replenish Lance's card stash and I'll share them with you over the next few Wednesdays.

To kick things off here's one of my favorites. It's a hand stitched card. I created the stitching template by sizing circles in my design software so I could get my stitches in just the right place on the card.

Kraft cardstock, October Afternoon Paper, Unity Cosmo Cricket "Material Girl" Stamps

And here's the template if you want to make your own. Just punch holes in between the dashes.
(Click to bigify).


Tuesday, October 19, 2010

Tools on Tuesdays: Cutting Grungepaper with your Cricut

A little tip for my Cricut using friends...

If you're like me and always trying to come up with ways to use your Cricut to cut more than just plain paper and wondered if you could cut Tim Holtz's Grungepaper I'm here to tell you... Yes! Yes you can!


Here are the settings:
regular blade=6
pressure = max
speed = max
with multicut on (I think it multicut twice, sorry... I don't really know how to run my Expression without Design Studio. Adding that to my list of things I need to learn....)
 
Plus I also recommend taping the edges of the grungepaper to the mat or it will take off on you. Painters tape is better if you have a newer mat, otherwise use scotch tape with an old mat.
 
Other than that, it cuts beautifully!

Sunday, October 17, 2010

Yay for Creating Keepsakes!

Now that I don't work at my LSS anymore and I don't teach anymore, I've been trying to find ways to motivate myself to use my supplies. As many many know (and a few may be shocked to learn), I'm a procrastinator. Yep, that's right, I need deadlines in order to accomplish anything. I've tried to train this "talent" of mine right out of me, but well... it just hasn't happened. So lately I've taken to participating in online challenges. Specifically I've been trying to do those sponsored by my favorite scrapbooking companies (interpretation: those that I have tons of product from and therefore needs to use most).

Recently I participated in a Creating Keepsakes Blog Challenge for "Blue Ribbon pages" based on their  September 2010 issue of Creating Keepsakes. Because, hey, I've got a few of those, right? :) I submitted my last two (well, truth be told, only two) State Fair themed pages, one a Blue Ribbon winner and the other only a White Ribbon winner. I was pretty stoked when a CK Editor, Brittany Beattie commented on my page (delight in the little things right?) but I was even more stoked when an e-mail from Kim Jackson (Sept 2010 CK Magazine article on page 87 with "Show us Your Blue Ribbon Pages" contest call out) appeared in my inbox to tell me I had won! Woot! Woot! :)

So this past week my prize box came...

And inside were some lovely goodies (mostly October Afternoon, my favorite!)...

Wednesday, October 6, 2010

Kukoyo users rejoice!

If you're like me, you mourned the loss of a most beloved adhesive, the Kukoyo Dot n Roller permanent, when it was discontinued last year. Well have I got NEWS for you today! I recently discovered the Elmers DotLiner is basically the same thing and much to my surprise, when I turned it over I discovered that the dispenser was marked Kukoyo! I do have to say the Elmer's version seems to be a little thicker and a little more sticky too. So, if you happen to come by some of these, don't hesitate to snap them up (and while you're at it... grab a couple for me too please!).

Thursday, September 2, 2010

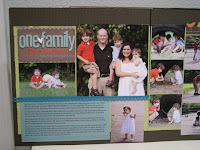
A very sweet family and a photo-loaded 2 page layout


Awhile ago I started the process of designing my layouts on my computer first, and then actually assembling the layouts later. The purpose for this is two-fold, one, I tend to feel less guilty about ignoring my spouse while sitting on the sofa next to him as I digitally compose my layouts, and 2) I wanted a way to capture the photos and the story promptly so I didn't forget key parts of the story by the time I did get around to scrapping. Oh yeah, plus I also have an aversion to cutting paper wrong. So I guess that was really 3 reasons, but hey, who's really counting anyway?

At the state fair they have a category for 2 page layouts. Well, I'm not a big photo taker (yes, I do realize that's contradictory to my scrapbooking hobby), so I borrowed photos from some friends of ours who have an absolutely adorable family. Plus, she always does a great job of picking a good color story for their clothing and this was no exception. Now, I know lots of you scrapbookers out there are looking for ways to pack a lot of photos into a two page layout, so this 10 photo design is for you!


This entry received an honorable mention as well.

As a bonus, I'm also posting the sketch that I created for this page.

Monday, August 30, 2010

Experimentation - Playing with Inks

My friend Linda and I got together for some unabashed creative experimentation awhile ago. I'd seen a Tim Holtz video for using compressed air with alcohol inks and wanted to try that technique out. She'd recently taken a class from a RangerU graduate and had a collection of technique tags she was going to teach me. So we got some dinner and got together to play with our creative toys. I have to tell you, it was like two little kids playing! We didn't worry about whether or not we were wasting supplies or if the idea wasn't going to work out. There were no wrong answers and not trying something wasn't an option. If you could think of it, we were trying it that night.

By the time the night was over, we'd tried all sorts of inks and stamps and techniques. I pulled out product I'd had for years, but never used because I didn't quite know what to do with it. Now I'm using my inks and stamps all of the time and actually getting use out of them! Some of the inks we played with I'd had for 10 years and was even thinking of adding to my next purge pile.   :-O

We quickly had all sorts of inks flying all over the place and had used up an entire can of compressed air.

Experimentation gone wrong. Here we learned that you cannot stamp first and splat second.

A few more experiments gone wrong... along with a few that went right :)


So here's my plug ladies: Play with your supplies! Learn how they work and what they do on different mediums, using different techniques. Or, if you're a little less independently experimental, then find a class at your local scrapbook store and learn something new today! :)

Sunday, August 22, 2010

Stepping outside of my box

Part of my purpose for entering the fair was to push myself creatively. Not only did I want to enter all of the categories, I also wanted to challenge myself to try things creatively that I wouldn't normally try.

I am typically a pretty clean and simple scrapbooker. My layouts usually have a simple elegance to them. For this particular creative adventure, I wanted to break past my simple layouts to use more pattern paper. I buy lots of pattern paper, but then I typically find myself only using a little bit of 1 or 2 patterns at a time. Well, I certainly broke past that phobia on this one! In hind sight, I probably would have switched out the pattern paper behind the photos so there was a place for the eye to rest and to make the photos pop a little bit, but otherwise, I'm pretty happy with it... oh and count 'em there's SEVEN different pattern papers on this layout. I'm not sure that this will become my permanent style, but I might break free from 1 or 2 pattern papers and really mix it up with 3.

These happy little farmers belong to some friends of ours. I may be a little biased, but I think these are some of the absolutely most adorable kids I know.  ;0)
This one was awarded a 3rd place ribbon.

Materials used:  Patterned papers, red alpha stickers (October Afternoon); Cardstock, Ribbon (Bazzill); Chipboard Shapes (Cosmo Cricket); brown felt letters (Amercian Crafts); brown rub-ons (Doodlebug); button (EK Success); Brown ribbon (Ki Memories)

Post Update:

Thursday, August 19, 2010

Inky fun with Compressed Air

One of the categories at our state fair is "Rubber Stamping - Other Than Paper." After playing with the Tim Holtz splattered ink technique I thought I'd take the technique to some additional mediums and see how it went. I can report that it doesn't work on Tim's special clay coated tags, it works reasonably well on metal but the ink doesn't seem to "stick" very well, and it works smashingly well on gesso'd canvas. So my inky canvas exploration turned into my fair entry. Plus, I have 96 cabinet doors that need to get used up, so I thought I'd use one of those as well.

This entry got a 3rd place ribbon. Pretty cool since it's the first time I've entered this category.

Materials used: Alcohol Inks, Crackle Paints, Distress Inks; Paint Dabber (Ranger); Compressed Air (office supply); Grungeboard, Ticket, Metal Embellishments (Tim Holtz); Trinket Pins (Maya Road); Ribbon (Jillibean); Stamps (Tim Holtz, Hero arts, Inkadinkadoo, other)

Tuesday, August 17, 2010

I got pies!

Ok, not really. Or at least not at this time of year anyway! Here's another state fair layout. This ended up being my "single page layout" entry.

Every holiday, my husband bakes pies for our families (But don't ask him to bake anything else, he couldn't make a cake or a cookie to save his life!) and one Christmas morning I snapped this picture of him. It captures his goofy personality (and stylish bedhead as he later pointed out) and I could resist trying to create a layout to capture that energy.

It took a bit of photoshop work to make the photo usable (it was a little blurry and needed some color correction), but it came out in the end.

To capture the look of his flaky crust I cut several layers of the letters "pies" from cardstock, stacked them and glued them together and then painted the edges a pie crust color. Then I created a cinnamon and sugar crust using Tim Holtz Distress Powders and Distress Stickles. One thing to note: if you use the tsukineko watermark pad to emboss with, not as much of the Distress Powders will rub away. If you don't want a fairly solid layer of the distress (i.e. want the Distress Powders to work the way Tim designed), then you really do need to use the Ranger Embossing Ink. I also used a copic marker to re-color the felt pie slice so it would coordinate with my page.

This layout received an Honorable Mention.

Products used:
Bazzill (cardstock); Basic Grey (patterned paper, felt pieces); Martha Stewart (deep edge punch); Tim Holtz (Distress Stickles and Powder); October Afternoon (tab).

Update (8/23/2010):  Today we went to pick up my entries and the little girl helping her mom with the fair was excited to learn that I was the one who had her favorite entry, "I Got Pies!" Then, as we were walking to pick up my entries she stopped, turned, looked at Lance and exclaimed, "You're the guy in the picture! YOU have the pies!" She then quizzed him all about his pie making as we picked up the rest of my entries. I suggested that maybe he should enter his pies in the fair and she said that was ok -as long as he brought her samples. It was too cute!

Sunday, August 15, 2010

A blue ribbon layout

On a whim last year I decided to enter our state fair. Boy was I surprised when I won two blue and a red ribbon on my first try. High off of my beginner's luck, I thought I'd enter again. As a little creative challenge to myself, my goal this year was to complete entries for every category. So in honor of our state fair beginning this weekend, I'm sharing my entries with you.

I thought I'd kick it off with my favorite entry this year... "Be You"

I've been wanting to do a "messy" layout with cardboard, paints, and inks. I tried to do an album cover earlier with blue and yellow Maya Mists, but that turned out green (oopsie!) so this was my chance to redeem myself.

The background is a chunk of a blueray disc player box that my husband brought home from work for me. He was riding his motorcycle that day and actually stuffed 3 pieces (just in case one got wrinkled) of cardboard into his riding jacket to bring it home. Do I have an awesome husband or what?

 
Coincidentally, it was a favorite of the judges too -this one won a blue ribbon. yay! :)


Products used:
Maya Road (Hydrangea and Lemon Metallic Mists, Trinket pins, canvas label); Prima (yellow flower); October Afternoon (patterned papers); EK Success (yellow button); Teresa Collins (blue chandelier thingy); American Crafts (crocheted flower); Making Memories (chipboard letters, paints); MAMBI (blue bling); Kaiser Craft (yellow pearls); Tim Holtz (grungeboard heart, red dabber paint); 7ge (label holder); Unity Stamps (quote); Hero Arts (trust in your heart stamp); Studio G (blue ink); Versafine (black ink).

Friday, July 16, 2010

Blog Neglect... and a little linky clean up

So I'm just a teenie, tiny, tad bit behind on blog posts at the moment. What can I say? It's been a crazy month (and a half). Since I don't have time to get caught up on posts, I did clean up the lovely buffet of links to the right. I wanted to have a convenient place to keep track of creative goodness and by adding them to the blog I can share them with you too. Check them out. They're some of my favorites :)

Saturday, May 29, 2010

Project Purge and Extreme Makeover "Scrapbook" Edition Begins!

Back in 2007 we finished our basement to include a fourth bedroom that I use for my scrapbooking room and office. Once we finished the structure of the room (walls, windows, flooring, etc.), I never really finished furnishing the room. I had put in some cube storage and a few Making Memories Embellishment Centers, but just had a mix-n-match collection of other furniture and folding tables for my work surface.


Well over time it's becomme increasingly more scrapbooking room than office and my stash of supplies has grown exponentially! Now that I've been in my current professional job for four years, I think I'm finally ready to admit that I just don't have the time that I used to for scrapbooking and it's time to trim the stash back to a manageable size. Coincidentally my sister had the opportunity to visit me and we've begun the great scrapbooking room make over and purge! All to culminate with a massive scrapbooking garage sale next weekend.

Jenny arrived Wednesday night with a Vibe full of IKEA furniture...oh my!

Which of course meant we had a whole lot of assembly to do!
(Looks good Jenny, just 4 more to go! Note the use of the "persuasion tool")

Then we had to unload the room...
(who let it get this messy anyway?)

Ah, finally... a clean slate!

Let's get some work tables and storage in this room!

Ta -da!

This concludes today's progress. :)
(p.s. Don't you think I have the bestest sister EVER!? I do!)